Step 1 ” Accessing Network Configuration Wizard in FileZilla Client
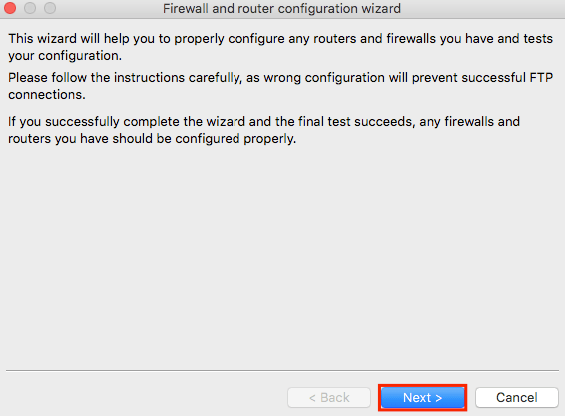
To access Network Configuration Manager in your Filezilla client, you press Edit and then select Network Configuration Wizard option.

You should now see a Firewall and router configuration wizard. Since we cannot make any changes here, press the Next button.
Step 2 ” Configuring Transfer Mode
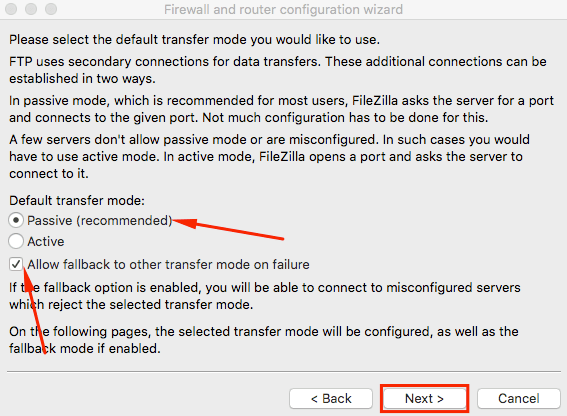
You can now select a transfer mode, choose Passive (recommended) as Default transfer mode. Afterward, click on Allow fallback to other transfer mode on failure and press Next.
Step 3 ” Configuring Passive Mode
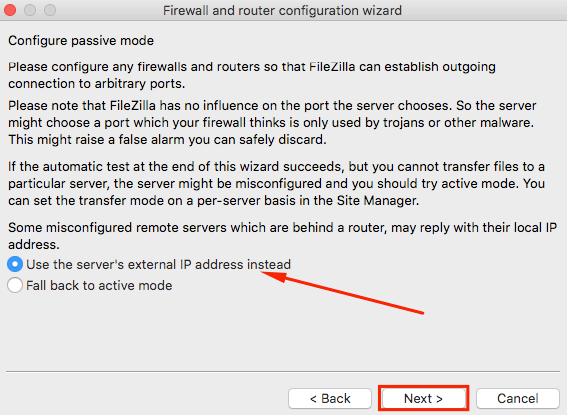
All you need to select here is Use the servers external IP address instead and press on Next
Step 4 ” Configuring External IP address
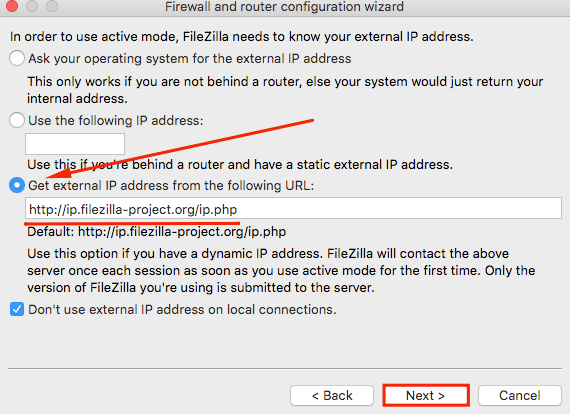
As you move forward with this configuration, you should select Get external IP address from the following URL:. If input field is blank, enter the default value which is http://ip.filezilla-project.org/ip.php
Once you have done that, proceed by pressing Next.
Step 5 ” Configuring Port Range
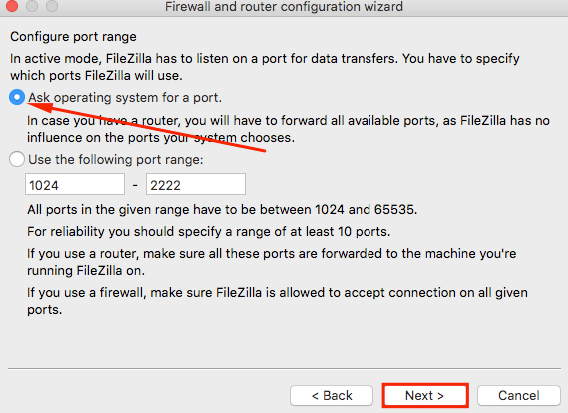
You do not need to make any specific port range configuration here, so select Ask operating system for a port and proceed by clicking Next.
Step 6 ” Testing Configuration
You have provided FileZilla with all the required information. Now you need to make sure that everything is configured correctly. Click on Test button and FileZilla will try to connect to probe.filezilla-project.org in order to perform some simple tests.
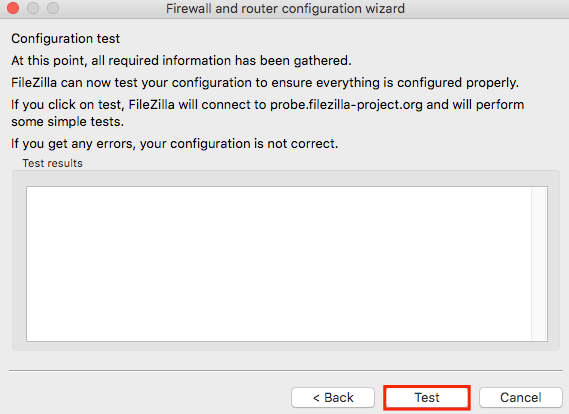
If the test was successful and you have not received any error messages, try connecting to your hosting account. If you still get the ECONNREFUSED error, contact your hosting customer support team for assistance.
Conclusion
By finishing this short tutorial, you have successfully configured your Filezilla Firewall and router settings. You should no longer get ECONNREFUSED “ connection refused by server error while connecting to the server.

